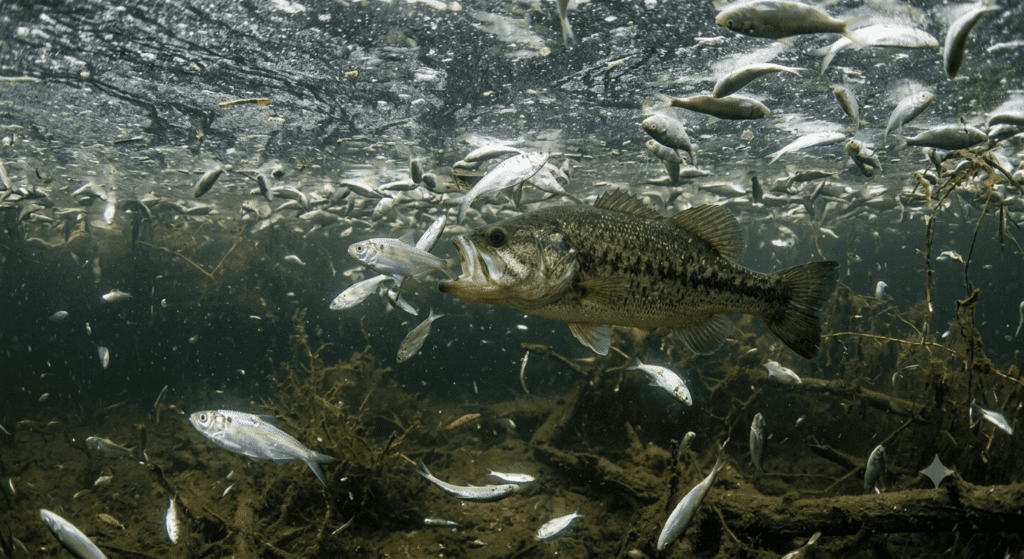
You spot it from a distance. Clouds of gulls circling. Dead shad coating the surface like a silver blanket. Your heart races. This is the feeding event you’ve been waiting for. But when you arrive and cast your live shad rig, nothing happens. Then you try your best shad imitator. Nothing. You’re watching one of Florida’s most dramatic natural events unfold, yet the bass won’t cooperate. Here’s the painful truth: during and immediately after a massive shad kill, largemouth bass become hyper selective and often ignore even the easiest meals. According to research from the University of Florida’s Institute of Food and Agricultural Sciences, bass feeding behavior shifts dramatically when baitfish populations experience sudden die-offs, making them paradoxically less responsive to available prey. Here’s how Florida bass anglers can trigger a second feeding frenzy using practical, counterintuitive strategies.
Understand the Overload Effect that makes bass reluctant to feed.
When thousands of shad die from cold water temperatures, algal blooms, or dissolved oxygen crashes, bass experience genuine sensory overload. The Florida Fish and Wildlife Conservation Commission notes that during major shad kills, bass have already consumed massive amounts of dying baitfish in the initial chaos. This abundance creates a paradox. Bass become gorged yet cautious. The dead and dying shad trigger a feeding response, but only briefly. Once bass have eaten their fill in the first hour or two, their behavior shifts completely. They become suspicious of anything that looks too easy, too available, or too much like the dead baitfish they’ve just consumed. Additionally, the overwhelming scent trail from thousands of dead shad masks the natural chemical cues that typically trigger aggressive feeding. The sensory landscape becomes noisy, and bass respond by becoming selective rather than aggressive.
Identify the Second Window that separates successful anglers from frustrated ones.
The critical 2-3 hour period after the initial kill frenzy slows is when bass switch their preference from dead and dying shad to live, active prey species. This window exists because the easiest meals are consumed, the scent trail becomes less stimulating, and surviving baitfish begin to scatter and school more defensively. NOAA data on baitfish behavior during environmental stress events shows that healthy prey species instinctively move toward cooler, oxygenated water zones. Bass follow, but they’re now feeding on a different prey type: healthy, active survivors rather than dying baitfish. During this window, your presentation needs to reflect active, living prey that requires effort to catch. This is when your catch rate spikes. Missing this window and fishing through the initial frenzy wastes valuable time and dulls the bass to your offerings.
Select lures that mimic healthy, active baitfish instead of easy victims.
Suspending jerkbaits outperform shad-imitating cranks during post-kill conditions because they create erratic, lifelike movement that mimics a healthy baitfish evading predators. A jerkbait’s pause and dart action signals to bass that this prey requires effort to catch, triggering predatory instinct rather than convenience feeding. Swimbaits, particularly soft plastic options in 4-5 inch sizes, work equally well because they maintain constant motion and demand active pursuit. Flukes fished on a slack line create unpredictable falling patterns that healthy shad cannot replicate, making them irresistible to selective post-kill bass. Conversely, standard shad-pattern crankbaits trigger rejection because they look too familiar, too static, and too similar to the dying shad bass have already rejected. The key difference is movement quality and the effort signal. During the second feeding window, bass want prey that moves like it’s trying to escape, not like it’s dying.
Locate surviving baitfish schools using modern electronics and water temperature breaks.
After a major shad kill, surviving baitfish concentrate in specific zones where water conditions support their survival. Use side imaging on your sounder to identify healthy baitfish schools moving away from dead zones. Temperature breaks are particularly valuable. According to USGS research on freshwater fish behavior during environmental stress, surviving baitfish congregate in areas with optimal dissolved oxygen and temperature conditions, typically near structure, springs, or deep holes with current. Look for areas where your water temperature sensor shows even a 2-3 degree difference from surrounding water. Bass establish feeding routes between these survival zones and deeper sanctuary habitat. By identifying where surviving baitfish school, you position yourself on the migration corridor where bass actively hunt healthy prey.
Adopt a Stealth Approach that respects the sensitivity of post-kill bass.
Boat noise and aggressive trolling motor usage send bass into defensive mode after a shad kill. The sudden abundance of food triggers heightened sensory awareness and caution. Instead, use long casts from 50-75 feet away, allowing lures to reach productive zones without spooking bass with your boat’s motor signature. Minimal trolling motor use preserves the subtle water conditions that post-kill bass depend on to locate and ambush fleeing survivors. Approach slowly from outside the secondary window zone, using your electronics to plot a course that avoids running directly over the baitfish and bass. Fish the shallow edges and adjacent deeper structure rather than directly in the kill zone. This positioning lets you intercept bass moving through natural feeding lanes rather than competing with the sensory chaos directly overhead.
The shad kill is dramatic, but the real fishing happens afterward.
By waiting out the initial frenzy, identifying the second feeding window, and switching to active, lifelike lures presented with stealth, you transform a frustrating situation into your most productive session. Success depends on patience, understanding why bass reject easy meals, and then exploiting the moment when they’re hunting healthy survivors. The next time you encounter a shad kill, remember that the real action doesn’t happen when the gulls are thickest. It happens 2-3 hours later, when bass have shifted strategies and are hungry for something that requires effort to catch.
Share your post-kill fishing experiences and the lure selections that worked for you in the comments section. Let’s build a community of anglers who understand the hidden dynamics of these natural events and consistently catch big bass when others are heading to the dock.